Build an HTTP Status Tester in 5 Minutes

You need to test how your app handles a 502. Or verify your error-handling middleware does the right thing with a 422. The usual options: spin up a quick Express server, use some third-party mock service, or hardcode a fake response and hope you remember to rip it out later.
Here’s a better option. This tutorial builds a webhook endpoint in QuickFlo that returns whatever HTTP status code you ask for. ?status=404 gives you a 404. ?status=200 gives you a 200. Two steps, no code, about five minutes.
What you get
A live HTTP endpoint that takes a status query parameter and responds with that exact status code plus a JSON body confirming what was returned. Useful for:
- Testing how your frontend handles different API error codes
- Verifying webhook retry logic in third-party integrations
- Simulating failures during end-to-end tests
- Checking that your monitoring actually fires on 5xx responses
The workflow JSON
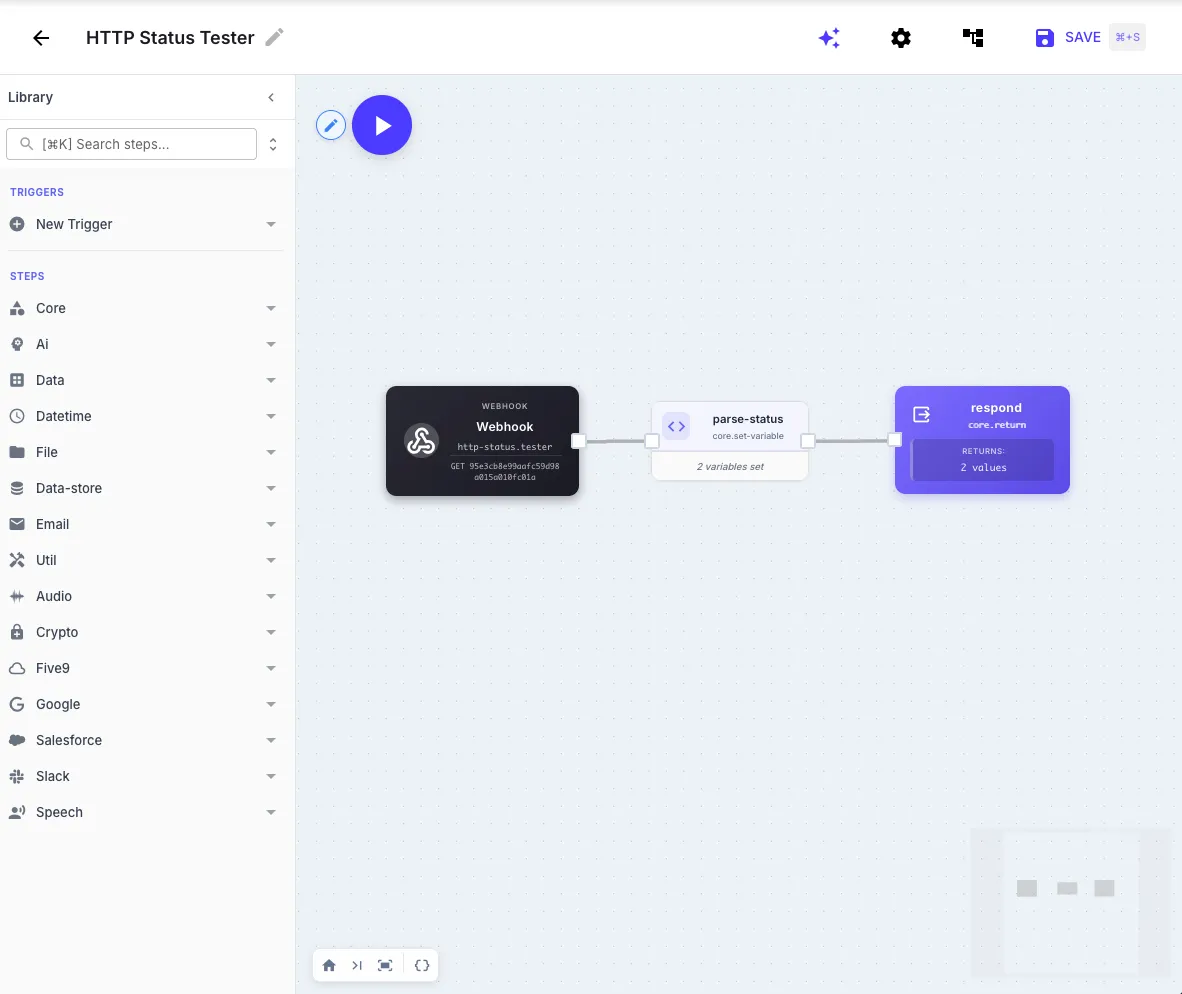
Copy the JSON below, then paste it onto the QuickFlo workflow canvas (Cmd+V / Ctrl+V). QuickFlo creates the entire workflow automatically.
{
"name": "HTTP Status Tester",
"steps": [
  {
    "stepId": "parse-status",
    "stepType": "core.set-variable",
    "input": {
      "value": "{{ initial.webhook.query.status | toInt | default: 200 }}"
    }
  },
  {
    "stepId": "respond",
    "stepType": "core.return",
    "input": {
      "webhookResponse": {
        "statusCode": "{{ $vars.value | toInt }}",
        "body": {
          "requestedStatus": "{{ $vars.value }}",
          "message": "HTTP status {{ $vars.value }} returned as requested",
          "timestamp": "{{ 'now' | date: '%Y-%m-%dT%H:%M:%SZ' }}"
        }
      }
    }
  }
]
}
Clipboard import
The clipboard import feature works on any QuickFlo workflow canvas. Copy valid workflow JSON to your clipboard, navigate to the canvas, and paste. QuickFlo parses the JSON and creates the steps, connections, and configuration for you.
How it works
The webhook trigger
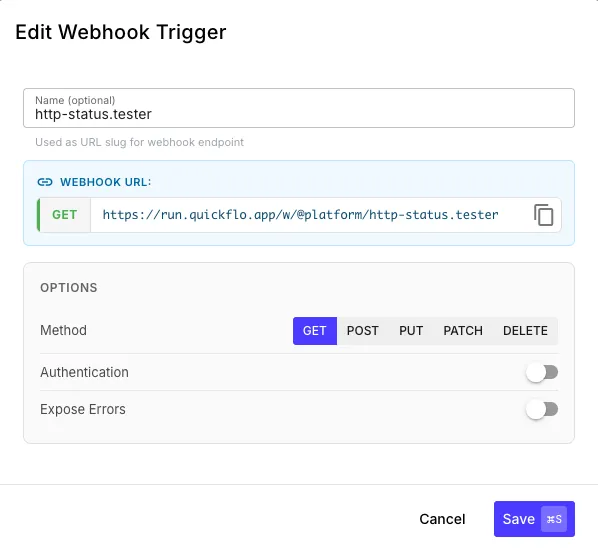
Any QuickFlo workflow can have a webhook trigger. You add one and give it a name, and that name becomes part of the URL — so a trigger named http-status.tester on the @platform workspace gets a live endpoint at run.quickflo.app/w/@platform/http-status.tester. It reads like a real named API endpoint, not a random UUID. JSON body properties are available as initial.propertyName. Query parameters land in initial.webhook.query, headers in initial.webhook.headers.
When someone hits ?status=404, that value shows up as initial.webhook.query.status inside the workflow.
Step 1: parse-status (Set Variable)
{
  "stepId": "parse-status",
  "stepType": "core.set-variable",
  "input": {
    "value": "{{ initial.webhook.query.status | toInt | default: 200 }}"
  }
}
Reads the status query parameter, converts it to an integer with toInt, and stores it as a variable. default: 200 means hitting the endpoint without a status code returns a 200 instead of failing. The output is available downstream as $vars.value.
Step 2: respond (Return)
{
  "stepId": "respond",
  "stepType": "core.return",
  "input": {
    "webhookResponse": {
      "statusCode": "{{ $vars.value | toInt }}",
      "body": {
        "requestedStatus": "{{ $vars.value }}",
        "message": "HTTP status {{ $vars.value }} returned as requested",
        "timestamp": "{{ 'now' | date: '%Y-%m-%dT%H:%M:%SZ' }}"
      }
    }
  }
}
The Return step controls the actual HTTP response the webhook sends back. The webhookResponse object wraps the response configuration — statusCode sets the HTTP status code (piped through toInt since the variable is a string from the query parameter), and body defines the JSON payload. We include the requested status, a human-readable message, and a timestamp so you can verify when it was generated.
That’s the whole thing. Two steps, no code, no external dependencies.
Try it
We host a public version of this workflow you can hit right now — no signup needed:
# Request a 404
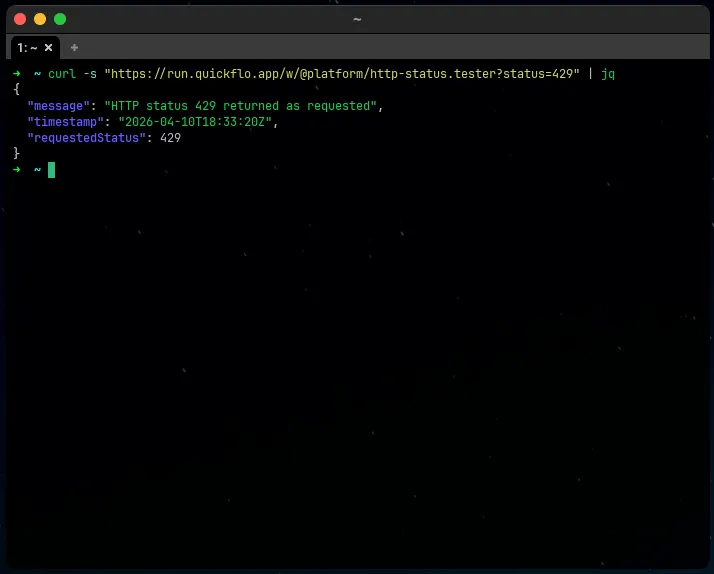
curl -s "https://run.quickflo.app/w/@platform/http-status.tester?status=404" | jq

# Request a 429
curl -s "https://run.quickflo.app/w/@platform/http-status.tester?status=429" | jq

# Request a 500
curl -s "https://run.quickflo.app/w/@platform/http-status.tester?status=500" | jq

# No status parameter -- defaults to 200
curl -s "https://run.quickflo.app/w/@platform/http-status.tester" | jq
If you built your own, swap in your webhook URL.
Each response looks like this:
{
  "requestedStatus": 404,
  "message": "HTTP status 404 returned as requested",
  "timestamp": "2026-04-10T14:32:07Z"
}
The HTTP status code on the response itself matches whatever you requested.
Testing from the canvas
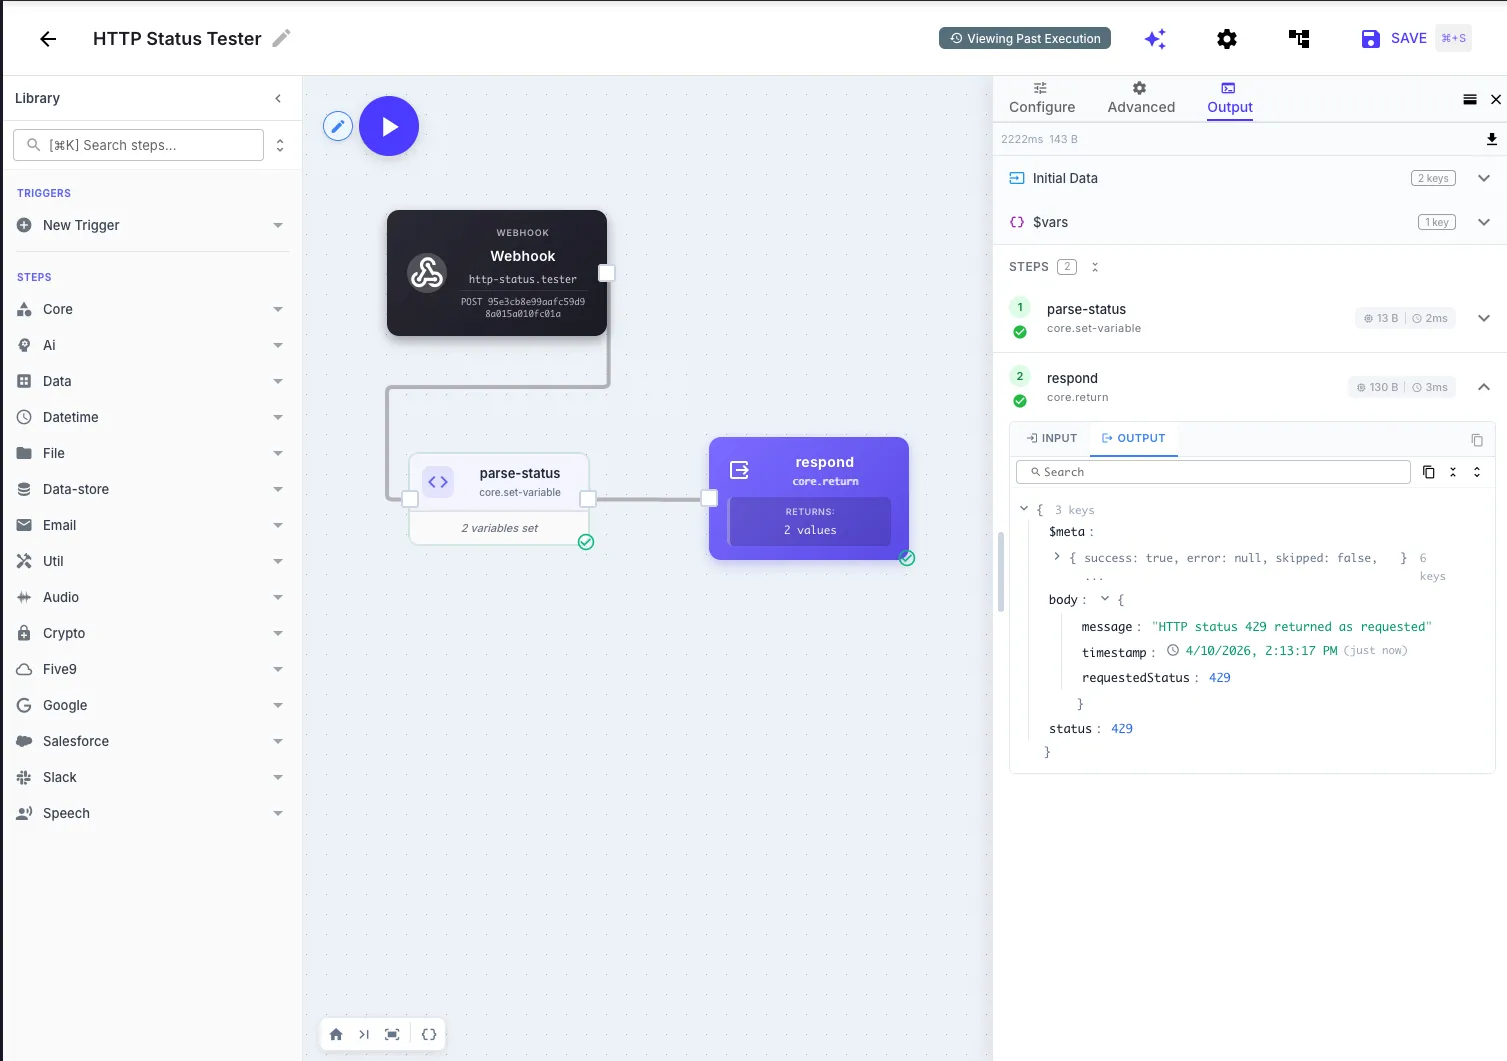
You can also test directly from the QuickFlo canvas using the built-in execution panel. Click the play button, pass in your test parameters, and see the step-by-step output without leaving the browser.
Where to take it from here
The workflow is intentionally minimal, but it’s a solid base to extend:
- Log requests to a data store. Add a data store step before the return to record every request — status code, timestamp, source IP. Now you have a monitoring dashboard for your test traffic.
- Return custom bodies per status code. Use a conditional step to return realistic error payloads. A 429 could include
Retry-Afterheaders. A 401 could return a proper OAuth error body. Turns it into a full mock server. - Add authentication. Restrict access so only your CI pipeline or test suite can hit the endpoint. QuickFlo supports API key and header-based auth on webhook triggers.
- Use it as a health check. Point your uptime monitor at the endpoint with
?status=200for a fast synthetic check that your QuickFlo workflows are running.
Get started
This is a good first workflow because it’s small, useful, and touches the core concepts — triggers, variables, templates, and the return step — that show up in everything you build on QuickFlo.
Check out the getting started guide to set up your workspace, or browse the solutions page to see what else you can build.